“Everything that slows us down and forces patience, everything that sets us back into the slow circles of nature, is a help. Gardening is an instrument of grace.” – May Sarton
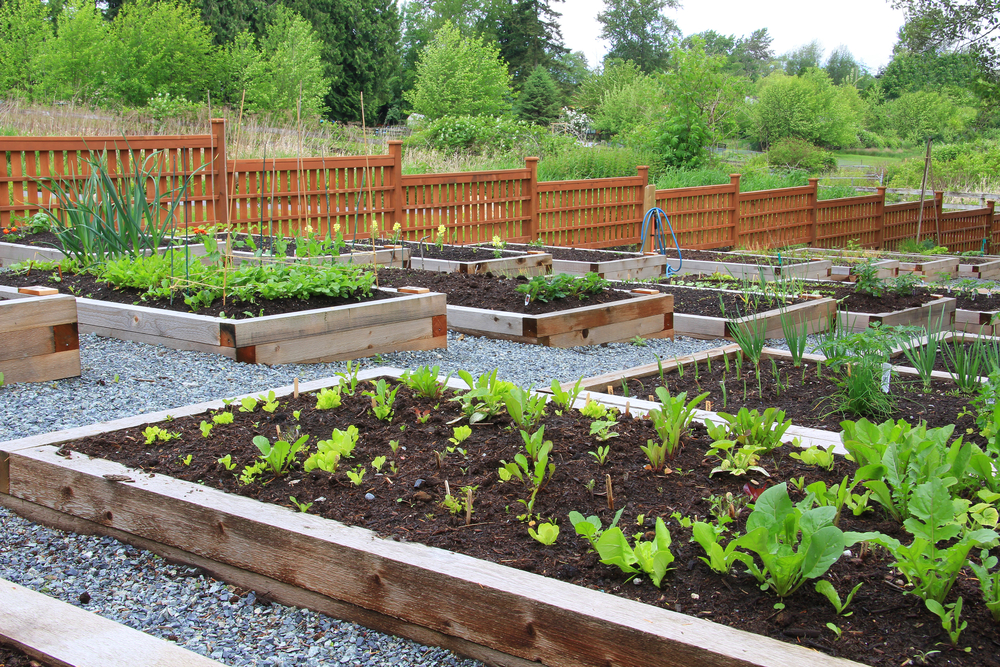
Little else says “home” than gardens in a yard, and garden boxes are a perfect way to house them.
The humble garden box comes in a wide variety of types and construction styles, from simple boards to corrugated galvanized metal sheets to railroad ties. And they are used for everything from nurturing starter plants, to herb or “salsa” gardens, to showcasing luxurious flower beds.
But building a proper garden box can be a bit of a challenge for the uninitiated.
A Few Good Reasons for a Garden Box
Garden boxes, or raised beds, as they are often known, take a bit of work, but have numerous benefits and a few advantages over in-ground garden beds.
The folks at Eartheasy.com note that raised beds,
- Are easier on your back as bending, stooping, and kneeling can all take its toll on your back and joints.
- Controls weeds and are known to deter rabbits, which will handily nibble in-ground crops growing at eye level.
- Improve drainage so that if your garden soil is normally wet into springtime, elevated beds solve this problem by lifting the soil above ground level and giving your plant roots room to breathe.
- Offer a head start on the growing season since raised beds filled with nutrient-rich, organic soil warm faster in spring due to their elevation away from the cold ground and their improved drainage.
In addition, raised beds – or garden boxes – can be attractive and add a distinctive visual element to your overall landscape and garden design. And, besides all that, they can simply look nice.
Simple Steps for How to Build a Garden Box
While there are a variety of construction styles and materials to choose from, attractive and appealing garden boxes can be quite simple.
Here is a basic set of instructions for a simple garden box you can build using some common tools and materials.
This plan will allow you to construct a 4 foot wide by 8-foot long cedar garden box that is 14 inches tall. Most garden experts recommend that raised garden beds be a minimum of 12 inches high and up to 18 inches. Using cedar is a good choice as it is an attractive wood and has a high resistance to rot and insects.
If you’re not already familiar with lumber sizing, a 2×4 is really only 1.5″ by 3.5″. This means that, by using four boards for the sides, this box will measure 14 inches high (4 times 3.5”)
By using eight-foot longboards, the only cuts required will be for the ends of the box and the corner and side posts.
Material List
- (12) – 2″ x 4″ x 8′ Cedar
- (1) – 4″ x 4″ x 8′ Cedar
- (1) – Box of 2-1/2″ deck screws
Cut List
- (8) – End boards @ 2″ x 4″ x 4′
- (8) – Side boards @ 2” x 4” x 8’
- (6) – Posts @ 4″ x 4″ x 14″
Directions
Step 1
For the 2″ x 4″ cedar boards, most big box hardware stores carry “Rough Green Western Red Cedar” lumber that is untreated. Using untreated wood prevents any chemicals from leaching into your soil.
Step 2
Your first cut will be for the end boards. By using 8-foot long standard length boards, you only need to cut these once each in the center, leaving you with a total of eight, 4-foot longboards. These will make up the four boards of each end of the box. (Note: The remaining eight 2” x 4” boards will be used as-is to create your 8 foot long sides.)
Step 3
The second cut is the six 4” x 4” posts. You will want to cut them no longer than 14 inches. This should leave a final cut-off piece almost a foot long. These will serve as your corner posts and two side posts for the long sides of your box.
Step 4
Start the assembly by attaching four end boards to two of your posts, one post at each end, using the 2-1/2″ deck screws.
Step 5
Now attach the 8-foot boards to the sides of the posts on your end board structures.
Step 6
At this point, your box is almost complete. Now attach the remaining two posts in the middle of your long sides. This adds structural integrity while preventing any warping in the longer sideboards.
Step 7
While not always necessary, adding a fabric weed barrier to the underside of your box can be a great idea. Roll a length of weed barrier cloth across the “bottom” of the box, cut to size, then staple or nail it on.
Step 8
Once your garden box is completed, position it in your yard or garden area, fill it with soil, etc., then add your plants or seeds.
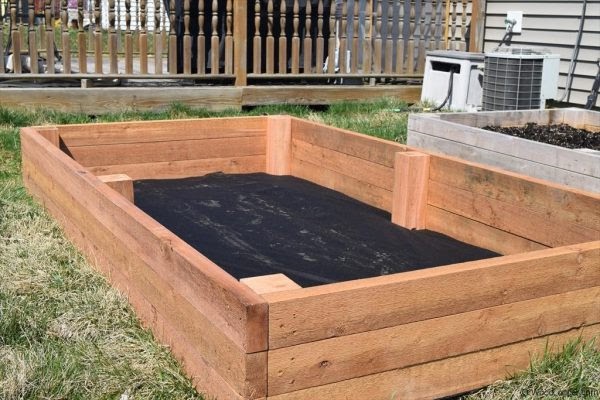
Image courtesy of MorningChores.com
The box in this picture was constructed the same way but only three boards high, which leaves the sides at just over 10 inches tall. This is certainly an adequate depth and will cost you about 10 or 15 percent less in materials.
Your Local Experts for Your Landscape and Garden Design Needs
Don’t hesitate to contact us for your garden, lawn, hardscaping, and landscape needs. We know that creating the best use of your available space is important to you and we’re here to answer any questions you might have about getting started on your garden design.
Spruce up your landscaping, or give it a complete makeover, and get ready to spend more time enjoying your outdoor space with family and friends!
If you have questions, or you’d like to schedule a consultation about your garden or landscaping project, contact the professional landscape designers and plant installers at Northview Landscaping today.
